I’m a big fan of screen recording.
Not that long ago I wrote this post comparing four screen recording tools for Chromebooks.
That post is going to need an update because Chromebooks now have their own, built-in screen recording feature!
Note: the new screen recording experience is only available for devices running version 89 of ChromeOS or higher. If you are using a school device, you may be running a slightly older version of chrome. To check what version you are using, type chrome://version into the URL bar.
How to use screen capture on a Chromebook
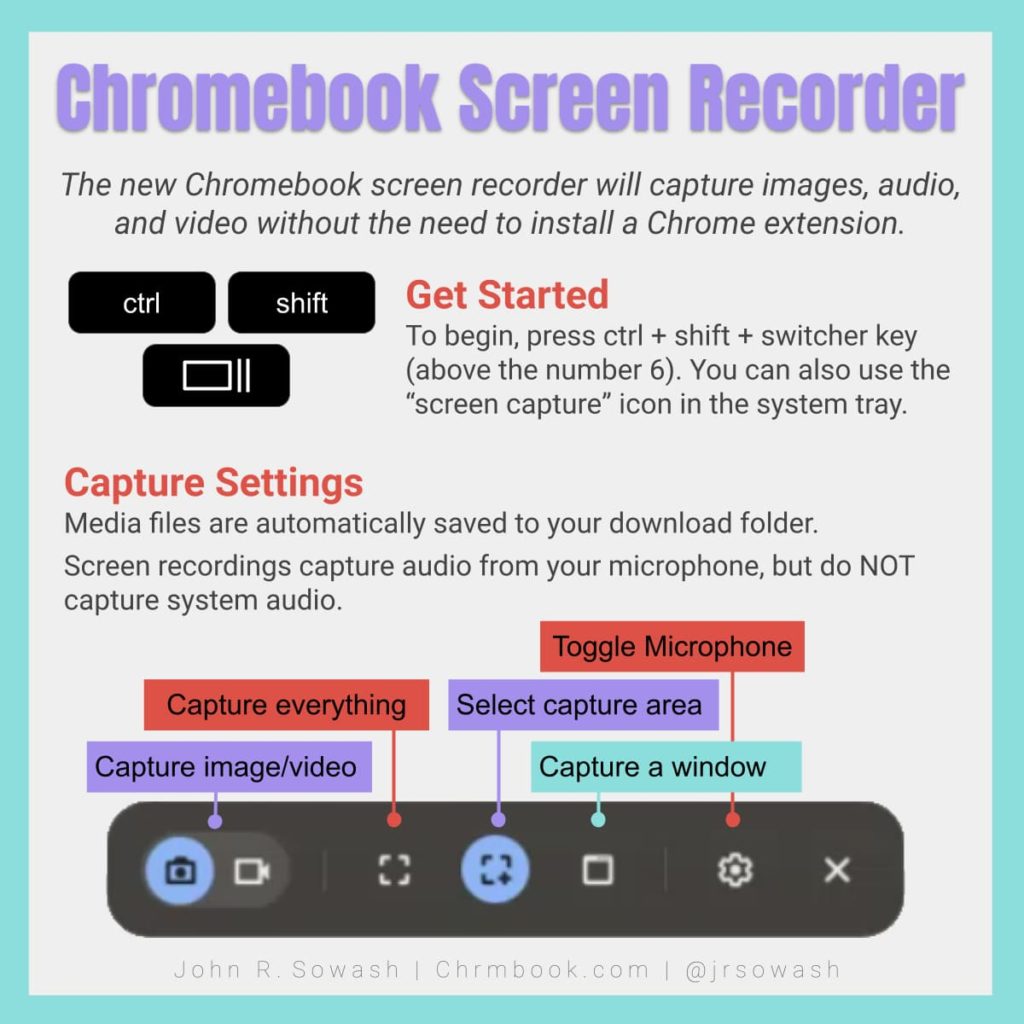
To get started, you need to press three keys together: Ctrl + shift + switcher (the funky key above the number 6 on your keyboard).
This will reveal the screen capture toolbar.

The first two buttons allow you to switch between taking a still photo and a video.
Let’s talk about the rest of the options on the toolbar.
Capture settings
- Capture everything – pretty straightforward…this button takes a photo of everything on your screen.
- Select an area – select the area of your screen you would like to capture by dragging your mouse to create a box. You can capture as much or as little of your screen as you would like.
- Capture window – This is a helpful feature if you are running an app and you would like to capture the entire window without the hassle of selecting it manually.
Screencast on a Chromebook (video)
If you slide the switch on the left side of the capture tool bar to the video setting, you can record the activity on your screen.
The same three capture icons will be available. You can capture your entire screen, a portion of your screen, or a specific window or app.
Before you start your recording, you need to decide if you want to capture audio. Click the gear symbol to toggle the microphone on/off.
Note: At this time, the screen recorder only captures external audio. System audio (i.e. audio playing from your Chromebook will NOT be recorded.
Screen capture works great for narrating a Google Slide presentation or explaining a homework assignment, but it’s not ideal for capturing video, or playing and discussing a short audio clip. Check out this post for a list of tools that will work!
How do I stop the recording?
It took me a minute to figure this out.
Once you have started your recording, a red icon will appear on the shelf at the bottom of your Chromebook.

When you are done recording, click the red icon to end the video and save the recording to your download folder.
Where do I find the recording?
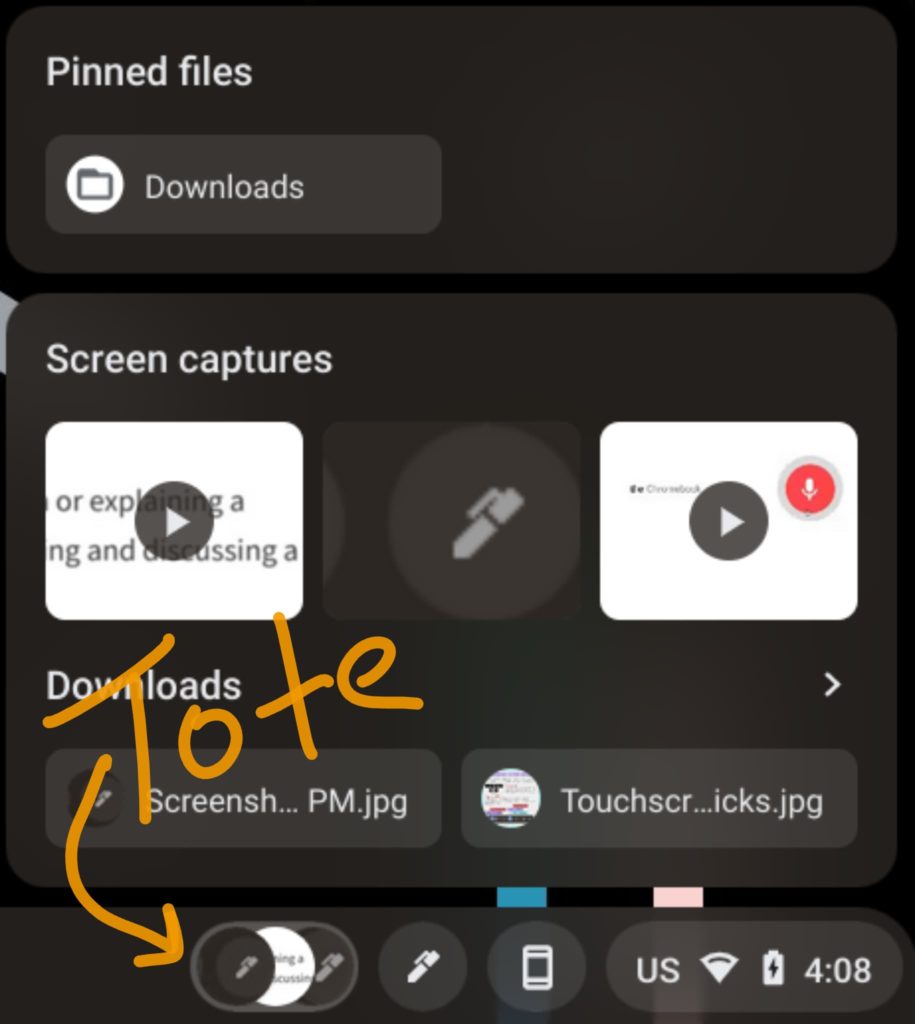
Screen captures and videos are typically saved to the download folder on your Chromebook.
Google has also introduced a new feature called “tote” that displays your last three downloads on the shelf of your Chromebook.
If you plan on saving this file for future use I recommend that you move it to Google Drive.
Note: If you are using a school-provided Chromebook, it is possible that your IT admin changed the default location for downloads. If you don’t see the recording in your download folder, look in Google Drive.
Chromebook screen recording example
Tips and Tricks
Hide your cursor: If you capture a very small area, like a button, your mouse cursor will be included in the screenshot. To avoid this, I move my mouse outside of the capture area and use my finger on my touchscreen to initiate the capture.
Auto Copy: screen captures are automatically copied to your clipboard. this makes it really easy to drop your image into a presentation, document, or Jamboard activity!
Annotate with Chrome Canvas: I use Chrome Canvas to annotate on top of my images. Grab a digital pen for your Chromebook to make it even easier!


Thanks for the tip on how to stop it! The UX could be better here, that’s what I came to look up.
That’s fair…it is a little rough around the edges!
Would you happen to know why the audio plays when I click on it from my files but not when it’s uploaded to Drive?