Organize your stuff with virtual desks for Chromebooks
Virtual desks will help you organize your tabs, apps, and resources!
If you are a Chromebook user you probably understand how easy it is to end up with dozens of open tabs.
Throw in a work and a personal Google account and that number expands quickly!
If you are a “tab-a-holic” (like me), virtual desks might be the feature you have been waiting for!
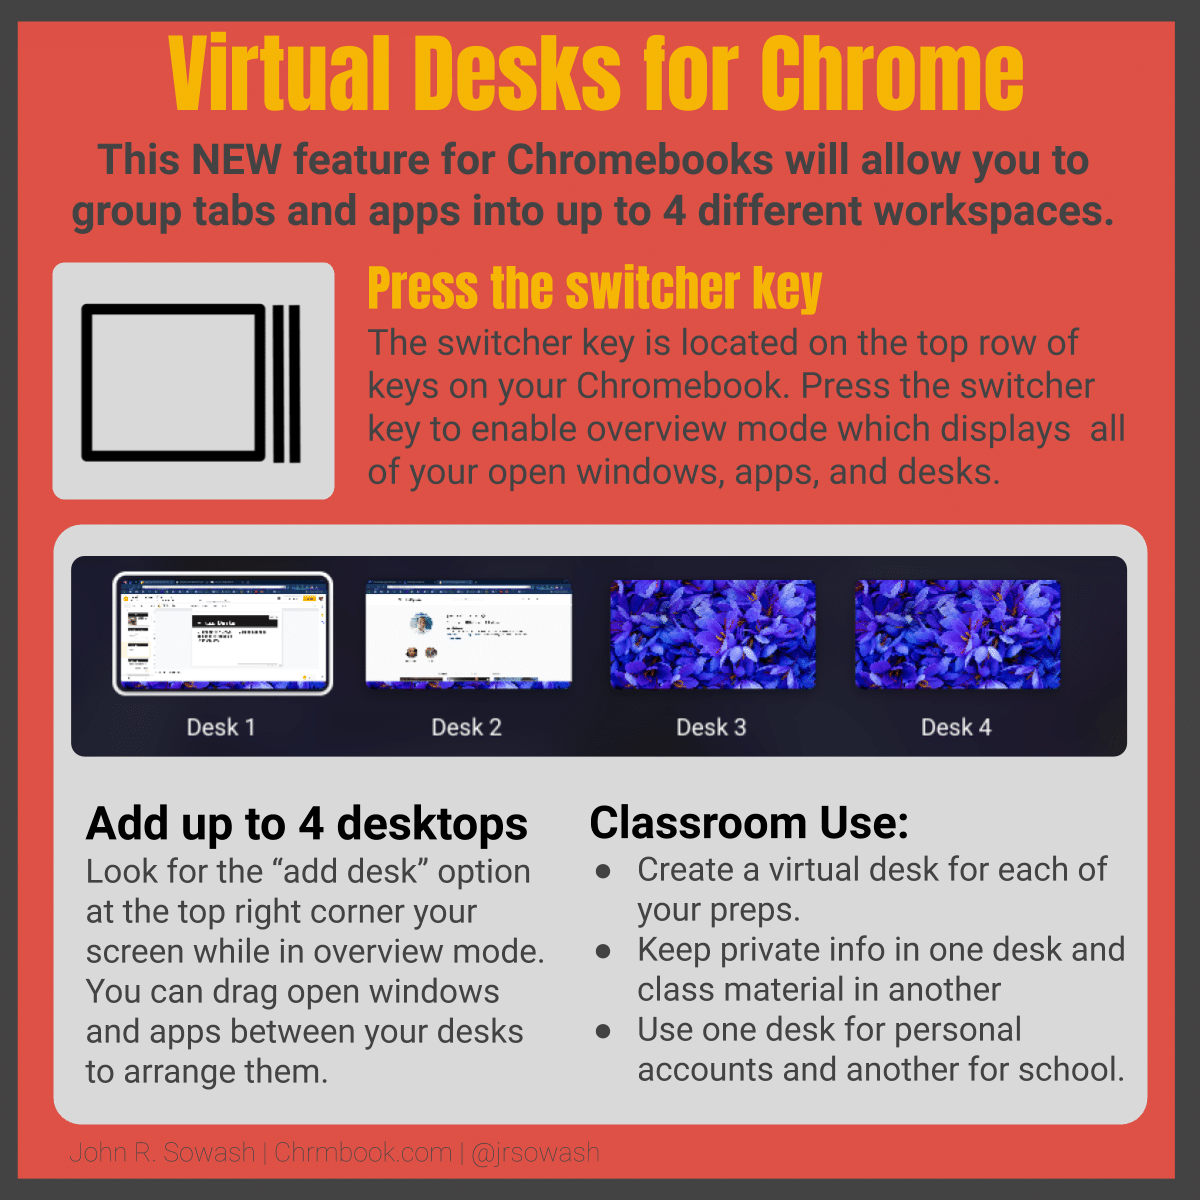
Starting with version 78 of ChromeOS, you can create up to 4 virtual desktops to organize your tabs, windows, and applications.
Think of each desk as a workspace that you can use to group resources for a particular task, account, or project.
Setting up virtual desks is kind of like having a second monitor, giving your a larger digital workspace all of your important files and resources.
Follow these steps to create a virtual desk
Setting up a virtual desk on your Chromebook is easy:
- Press the window switcher key (just above the #6 on your Chromebook)
- Look for the “new desk” option in the top right corner of your screen
- You can add up to 4 virtual desks
- Drag open windows or applications from desk to desk
Note: if you don’t see the “add desk” option in the top right corner of your screen, your Chromebook may not be updated to version 78 of ChromeOS. Follow these instructions to see which version you are using and update your devide.
To use virtual desks effectively, you will also need to be comfortable dragging tabs into new windows so that you can move them to a new desk.
This quick GIF demonstrates the basics

Related: 5 Chromebook productivity tips for teachers
Keyboard shortcuts for moving between virtual desks
Once you embrace virtual desks you can make them even better by using keyboard shortcuts to move between open desks. I have found the keyboard shortcuts to be the key to using and liking this feature. Once you get the hang of it, moving between desks with the press of two keys is unbelievably fast!
Here are the important keyboard shortcuts you should know:
- Create a new desk: shift + search + =
- Move to desk on the right: search + ]
- Move to desk on the left: search + [
- Move active window to desk on the right: shift + search + ]
- Move active window to desk on the left: shift + search + [
How to use virtual desks in your classroom
Virtual desks for Chromebooks is a great feature for teachers. Here are a few ways that you can use virtual desks in the classroom.
Create a desk for each class you teach:
This is especially helpful if you teach several classes back-to-back. You can prepare all of your tabs, links, videos, and presentations on on seperate desks. When the class begins, switch to that desk and you are ready to go!
Create a Desk for sensitive and private information
If you regularly connect your classroom projector or TV to your Chromebook, you run the risk of inadvertantly projecting your email, gradebook, or other sensitive information.
You can mimize that risk by organizing all of those applications on their own desk.
Keep your work and school life seperate
If you use one computer for work and personal content, virtual desks are very handy. Log into your personal mail, social, and other accounts on one desk and use a second desk for your work related accounts.
Students can also benefit from using virtual desks.
There are also a few things teachers need to be aware of with this new feature.
Virtual Desks tips for Students
Stay on top of your homework with virtual desks
Students can use one virtual desk for their calendar, Google Keep, and their to-do list. Need to add something or check a due date, just switch to that desk!
Virtual desks for big projects
If students are working on a long-term project like a research paper or group presentation, they can keep all of their resources and research on one desk. This makes it easy to continue working on the project throughout the day without wasting time re-opening lots of tabs, documents, and bookmarks.
Hide all the things you don’t want your teacher to see
Okay, this isn’t really a recommendation, it’s more of a warning for teachers!
Virtual desks make it a bit easier for students to “hide” games, chat conversations, and other content that they don’t want their teacher to see.
Teachers, you need to make sure that you know how to switch between open desks to hold students accountable for their in-class browsing habits.
Just press the window switcher key (the one above the #6 for a quick view of what is open on each desk).
Give virtual desks a try…and let me know what you think!
What do you think? Have virtual desks changed the way that you manage and organize your tabs, apps, and resources? How do you use your desks?


I did not realize this!!! Thank you for the great blog post and how this can be useful for both teacher and student!
Thanks, Dellere! I would love to hear how you and your students end up using this feature. Tag me in a tweet: @jrsowash
Can you create these with a PC in Google and not just with chromebook?
Yes by pressing the Windows Key + Tab, click New desktop to add a virtual desktop.
If you have two or more desktops already open, the “Add a desktop” button will appear as a gray tile with a plus symbol. You can also quickly add a desktop by using the keyboard shortcut Windows Key + Ctrl + D.
Looks like it, based on what Simon said.
Virtual desks are an operating system feature, so it is something that Windows would need to create natively.